Road Marks (Road Painting Tool)
The Road Marks tool is used to place all types of road surface markings on the map. These markings represent real-world traffic guidance elements such as:
- Arrows
- Symbols
- Text markings
- Crosswalks (zebra crossings)
- Lane direction indicators
Road Marks are essential for creating accurate and readable road layouts in RepliMap.

How to Use Road Marks
Road Marks are added using a simple drag-and-drop workflow.
Step-by-Step Process
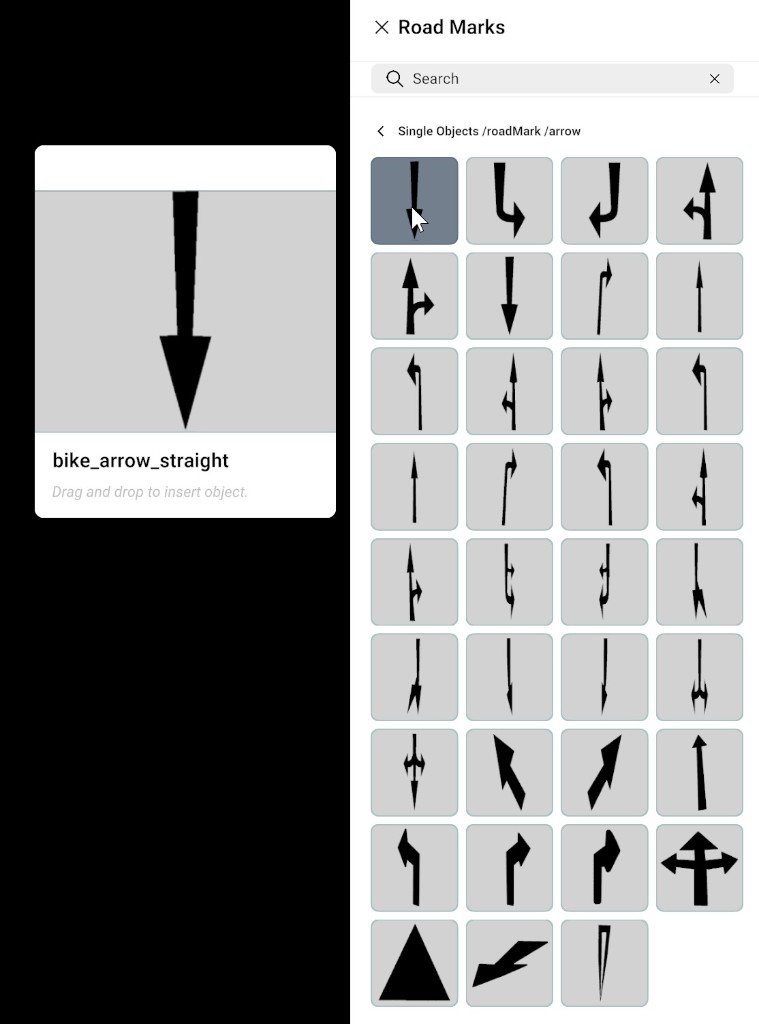
- Open the Road Marks panel from the bottom bar.
- Browse through available categories or search by name using the search bar.
- Select the required road mark object (for example arrow, text, or crosswalk).
- Drag the selected object onto the canvas.
- Drop it at the desired position on the road surface.
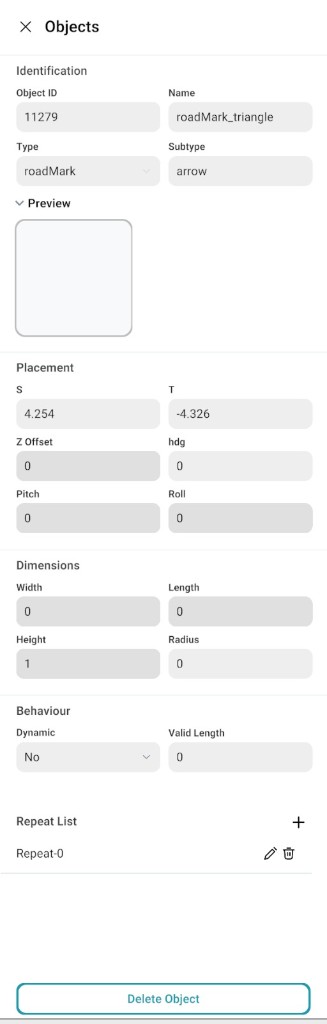
- Click the placed object to open the Object Properties Panel on the right side.
- Adjust and configure the object settings as needed.
Auto Road Selection
The Auto Road Selection tool controls which road receives the road mark when you place it on the canvas.
| Setting | Behaviour |
|---|---|
| Enabled | Road marks are automatically added to the nearest road. |
| Disabled | Select the road using Right-Click before placing; the road mark is placed only on the selected road. |
For complex junctions where automatic detection may be wrong, turn Auto Road Selection off, Right-Click the road you want, then place the road mark with drag and drop.
Object Properties Panel
After placing a Road Mark, the Object Properties Panel allows you to modify its attributes. It is the same panel as the Object Properties Panel used for other objects.
You can adjust:
- Position alignment
- Rotation (direction of markings)
- Scale (size adjustment)
- Visibility settings
- Style and appearance (depending on object type)
Road mark object properties screenshot