Mapbox
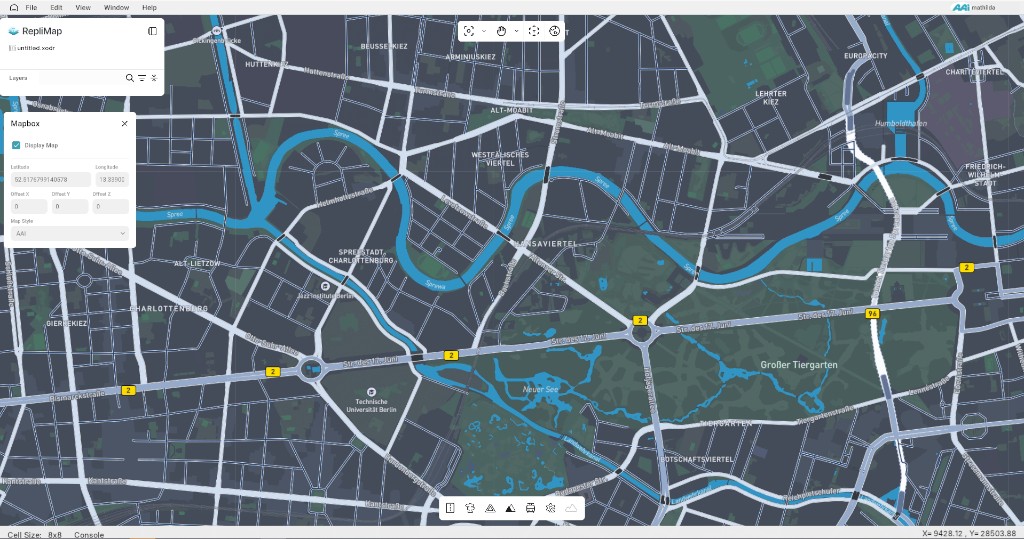
Mapbox-style layers (raster or vector tiles, or compatible services) give visual context while you edit: streets, labels, or custom styles. They help you align RepliMap geometry to the real world without replacing your authoritative HD map data.
Role in RepliMap
- Basemap under your editable layers.
- Orientation when georeferencing projects or checking drift.
- Optional dependency: many workflows work fully offline once imagery or tiles are cached—this depends on your deployment.
Integration Notes
- Respect terms of use and attribution for any third-party tiles.
- Performance: tile zoom levels and cache size affect editor responsiveness on large scenes.
- Projection: Mapbox-style maps typically use Web Mercator (often EPSG:3857). Your project may use a local ENU, UTM, or another CRS, so the basemap may not match geometry pixel-perfect out of the box. Use the Mapbox offsets (below) to fine-tune alignment in X and Y when needed.
Mapbox Panel
In the Mapbox panel you can:
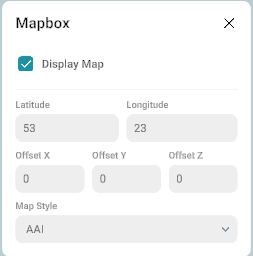
- Show or hide the basemap. By default the map display is disabled until you turn it on.
- See latitude and longitude at the top of the panel. These describe the reference location for the Mapbox view (for example the centre used for the layer).
Alignment Using Offsets
If the Mapbox layer does not line up with your road network or reference data, adjust Offset X, Offset Y, and Offset Z:
| Offset | Effect |
|---|---|
| Offset X | Shifts the basemap left or right relative to your map. |
| Offset Y | Shifts the basemap along the north–south axis (forward/back in map terms). |
| Offset Z | Adjusts vertical placement (height): moves the basemap up or down for a better match to your scene. |
Small iterative adjustments are usually easier than a single large correction, especially after changing zoom or pan.
Related
- Image — static orthophotos vs tiled basemaps.
- Main screen overview — where map view and tools interact with the canvas.