Reference Image
Reference Image is a raster image used as a georeferenced background layer in the editor. It helps users trace map features, verify alignment, and compare designed data with real-world visuals.
Georeferencing
To accurately place a reference image in the map, the following parameters are used:
| Parameter | Purpose |
|---|---|
| Position (X, Y, Z) | Defines the location of the image in map space. |
| Rotation (T) | Defines the orientation of the image. |
| Scale (X.SC, Y.SC) | Defines the scaling of the image in X and Y directions. |
Proper georeferencing ensures correct alignment with map geometry. Incorrect values may lead to misalignment and distortion.
Supported Formats
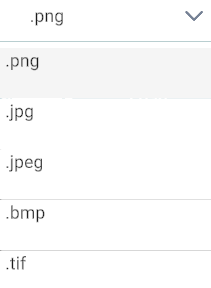
Reference images support the following file formats:
- PNG
- JPEG
- BMP Currently Not Supported
- TIFF
How to Import a Reference Image
A reference image can be imported using either of the following methods:
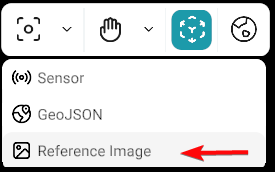
- Top-Center Toolbar — Click the Reference Image button in the top-center toolbar.
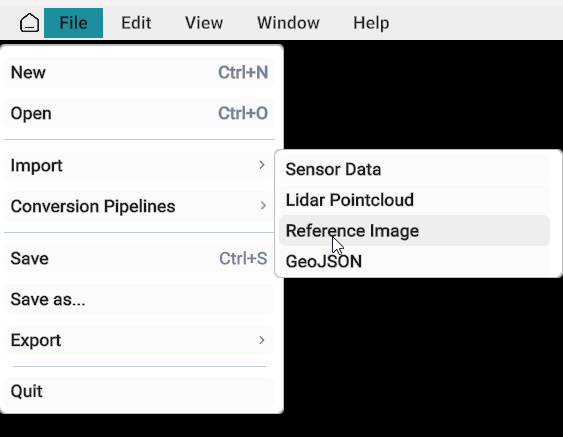
- File Menu — Navigate to File → Import → Reference Image.
Note
If no reference image is currently loaded, clicking the Reference Image button in the top-center toolbar will open the Import Reference Image window.
If a reference image is already loaded, clicking the same button will open the Reference Image Panel instead of the import window.
To import via the File menu:
- Go to the File menu from the menu bar.
- Click Import from the dropdown list.
- Select Reference Image from the import options.
An import window will appear:
- Select the location of the image file.
- Choose the image format from the format dropdown (bottom-right side).
- Click Load.
After loading, the Reference Image Panel will open.
Reference Image Panel
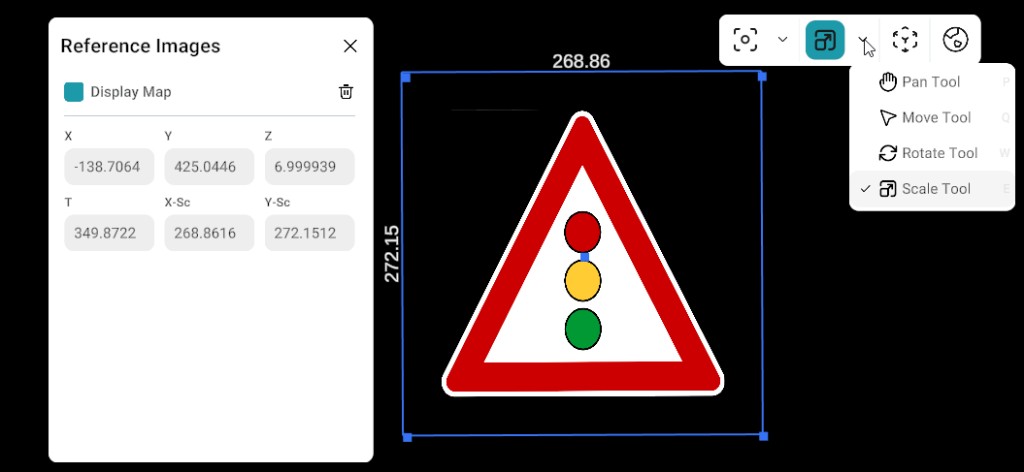
The Reference Image Panel contains the following values:
- X
- Y
- Z
- T
- X.Sc
- Y.Sc
- Lock aspect ratio
The panel displays transformation and scaling parameters of the imported image. Each parameter can be adjusted to control placement and alignment.
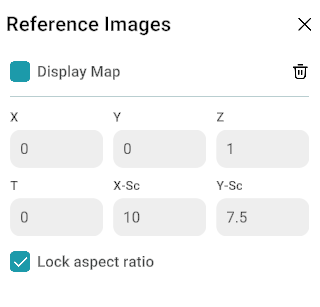
Image Selection
- A checkbox is available before the image name in the panel.
- This checkbox is used to highlight the image in the map view.
Image Modification & Size Adjustment
Users can adjust the reference image width, height, scale, and position using:
- Reference Image Panel
- Gizmo tool
- Border handles around the image
All methods provide direct control over image placement and sizing in the map.
Aspect Ratio Toggle
Aspect Ratio Toggle for Reference Images allows the image's width-to-height ratio to remain fixed during resizing, preserving its original proportions.
Use the Lock aspect ratio checkbox at the bottom of the Reference Image Panel to enable or disable this behavior. It is checked by default, so proportions are preserved unless you turn the option off. When enabled, resizing via the panel, gizmo, or border handles keeps the original image proportions.
Warning
There is no undo option for reference image transformations. Any changes to size, position, or scaling must be done carefully.
Note
Reference images are not visible in Scenery View.
Related
- Mapbox — continuous tiled context vs single images.
- GeoJSON — vector overlays on top of imagery.
- Main screen overview — reference data panels and import from the File menu.